Creating a star wars artwork

Luke Skywalker's Landspeeder
Some initial sketches are done to explore angles and sent out (in this case to the author and Lucasfilm) for discussion and approval. After some back and forth the angle is nailed down and the first stage of creating the artwork for Luke's Landspeeder can begin...
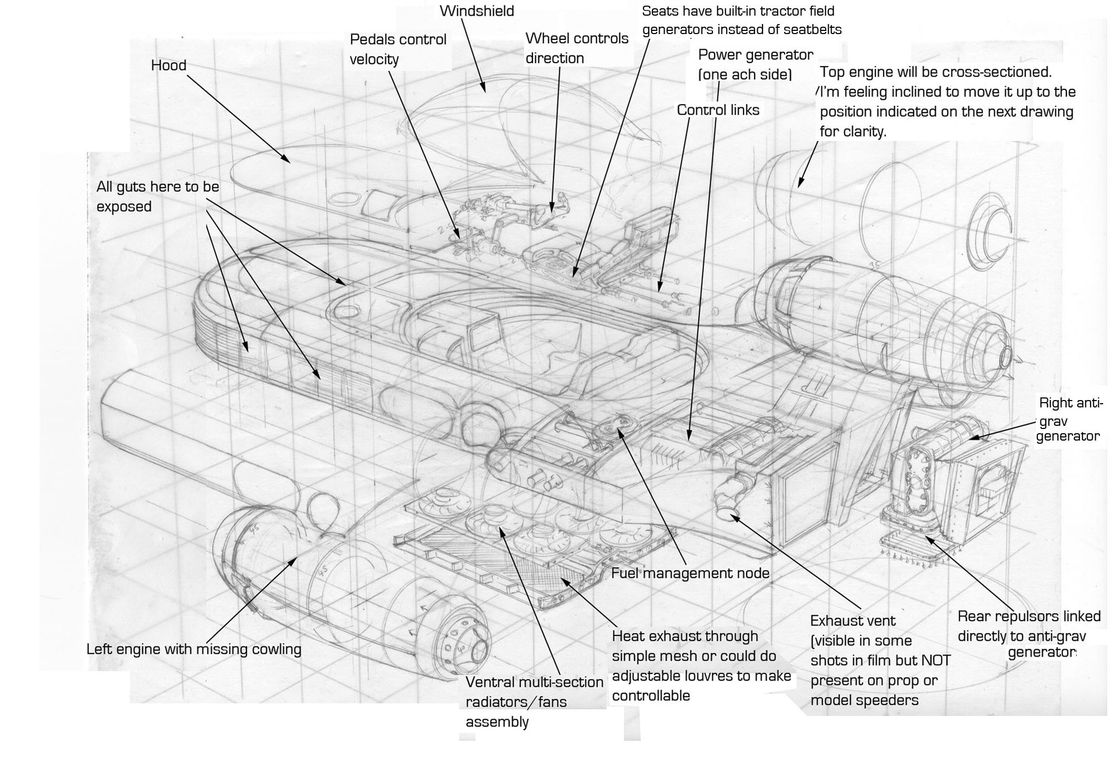
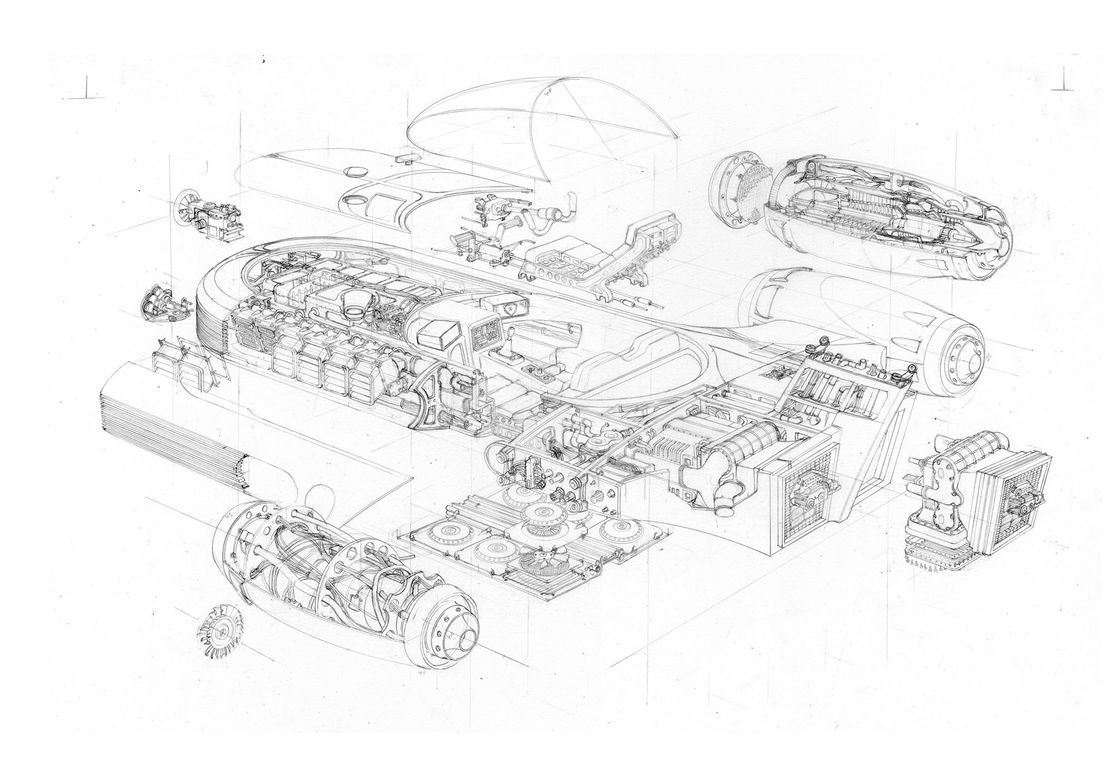
Since no photographs were available of the speeder from the angle I wanted, I drew the basic layout on a perspective grid. These are skills learned in college back in the early 1980's and I still regularly use them. I've already added some annotations to explain my thinking to the author and all the other people in the loop who check for continuity and accuracy.
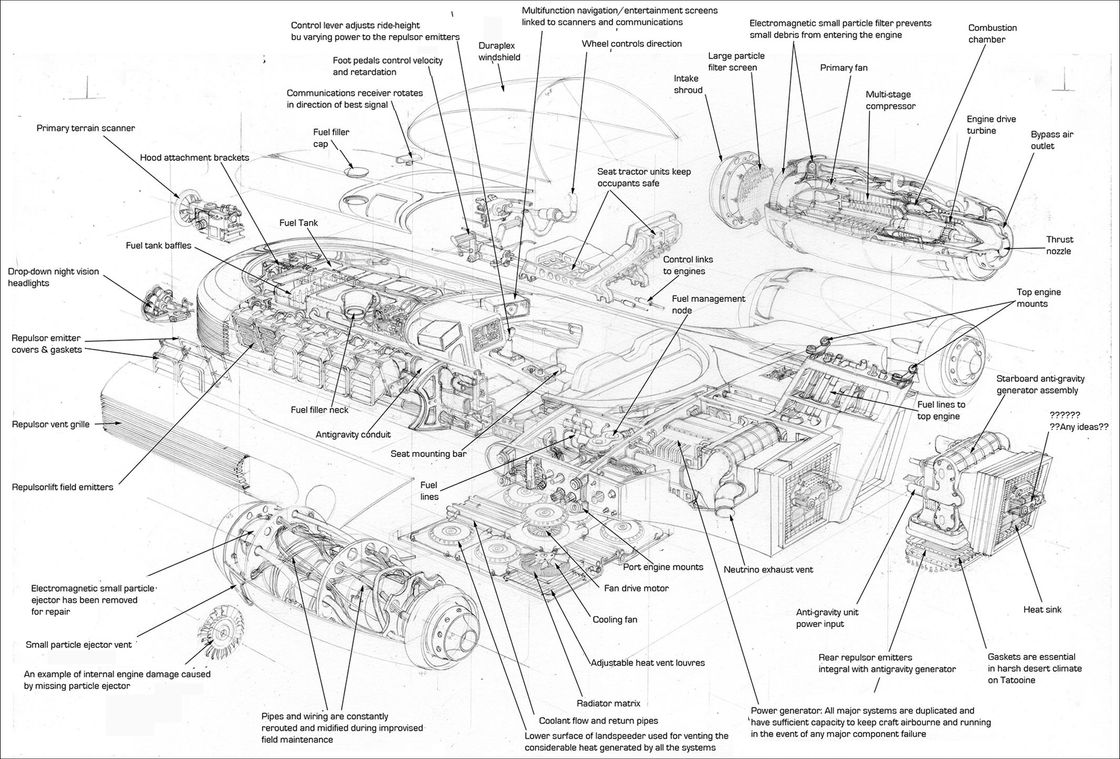
The drawing then progresses through several stages until a fully annotated scan is sent for approval. Since this is a ship from Star Wars, all parts seen in the movie are drawn with great attention to detail right down to the scratches on the paint and all the internal parts are designed logically, the idea being to try to create a system or component for each function of the vehicle and link them with cables, a power source, cooling, insulation and anything I can think of to try to make the cutaway convincing.
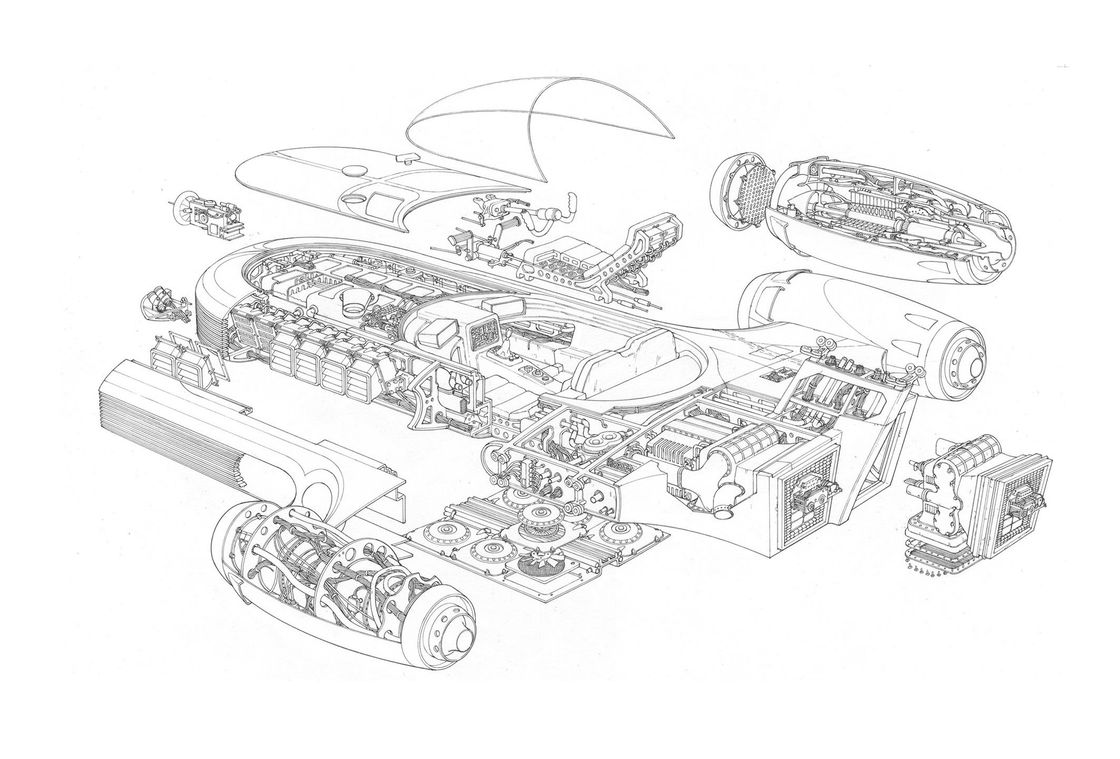
After the finished pencil is approved, it is inked with an Isograph 0.18mm pen.
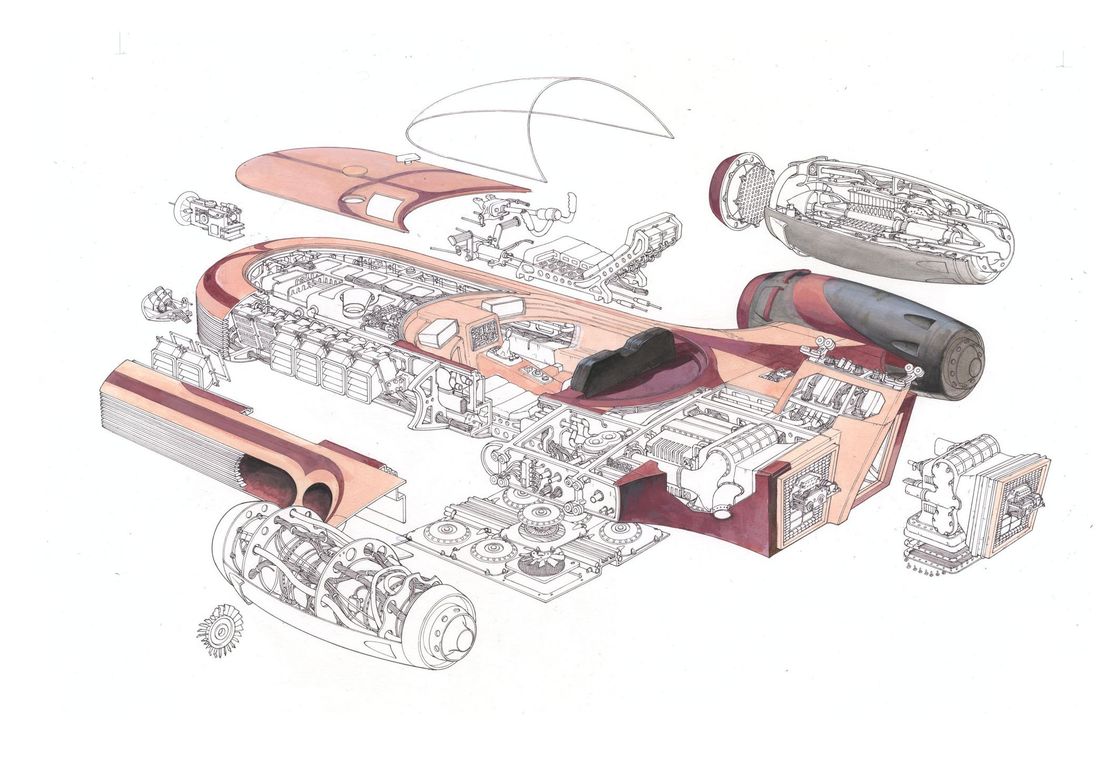
When the ink is complete, painting can begin. I use a mixture of acrylic Gouache and standard Gouache. Here, after deciding the direction of the light sounce, some base layers of colour are applied in acrylic which can be over-painted without the paint underneath lifting.
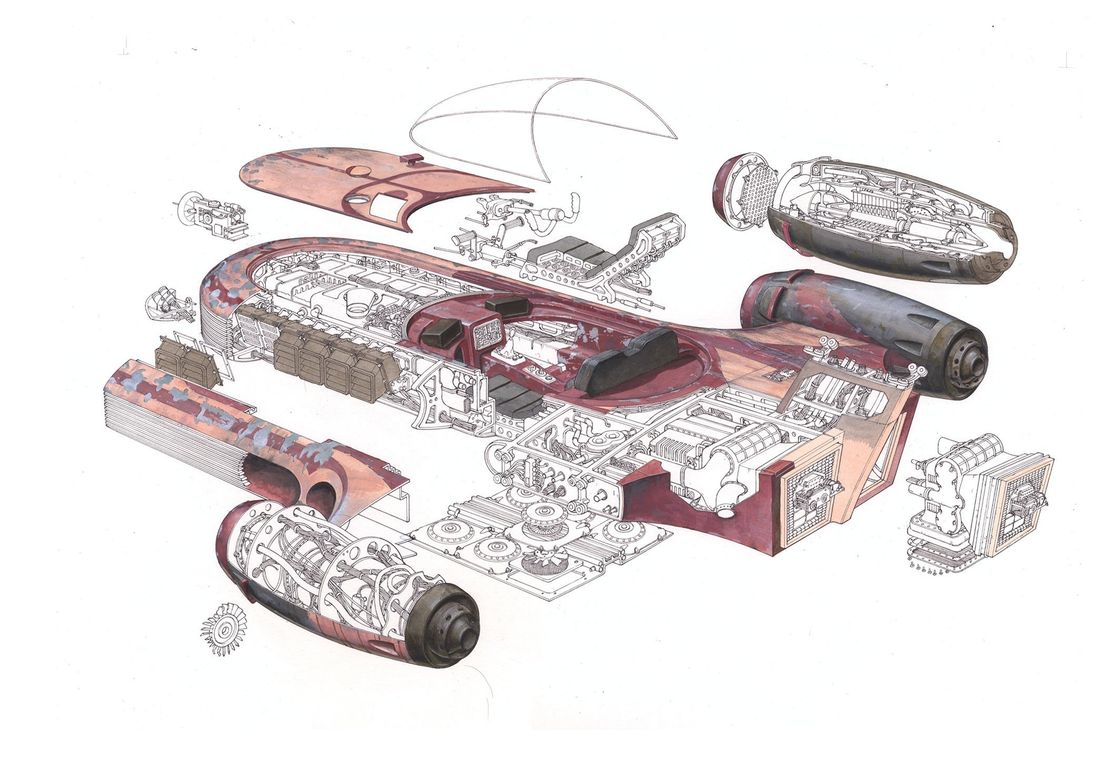
Paint is built up layer by layer, adding contrast and texture. I find it easier to work from the outside in.
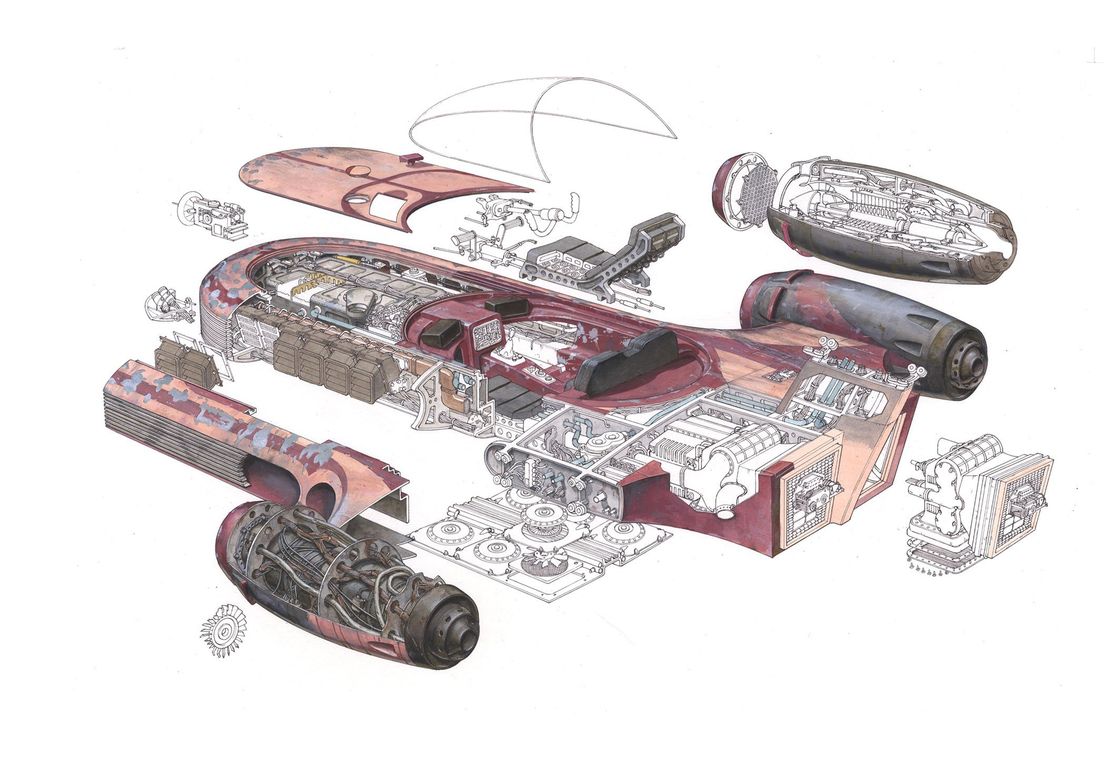
With most of the exterior done, work starts on the insides. The technique is the same, building up paint in layers creating contrast and texture.
Obviously, this work is pretty laborious and I'm the first to admit it can be a bit of a slog. But the pressure of a deadline keeps the painting going for sometimes 14 or 15 hours a day.

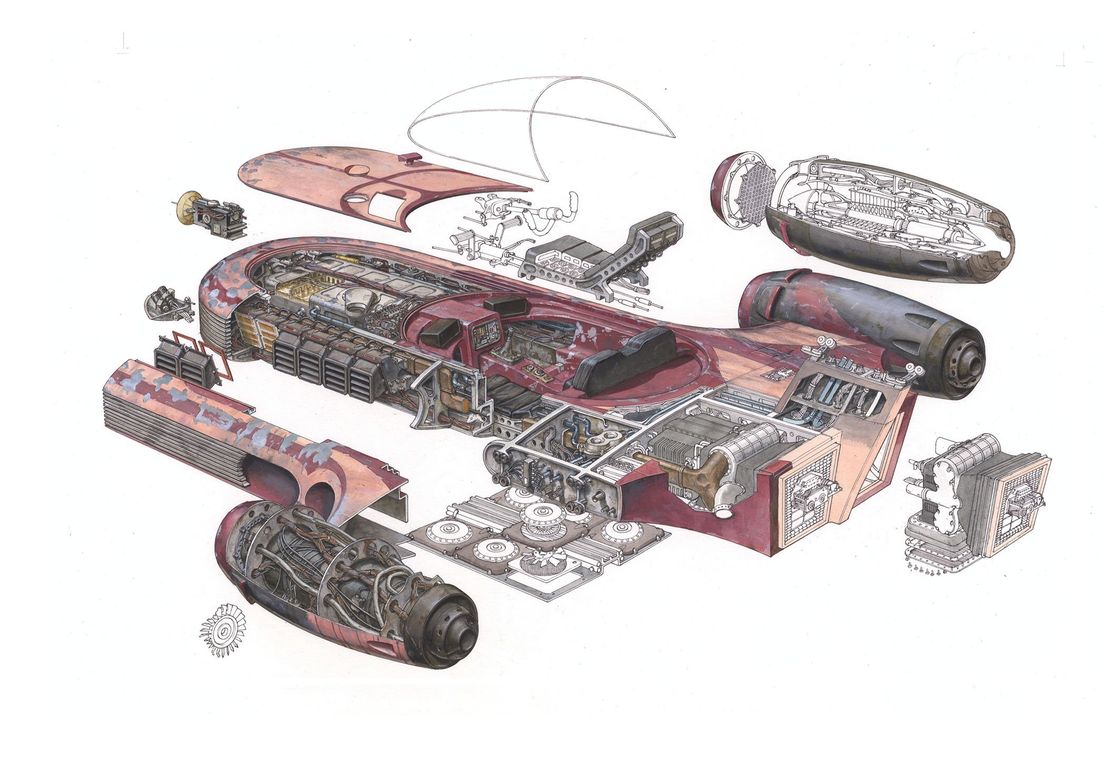
Almost there... The scratches, flaking paint, oil stains and dirt are all matched as closely as possible to what is seen in the Star Wars movie.
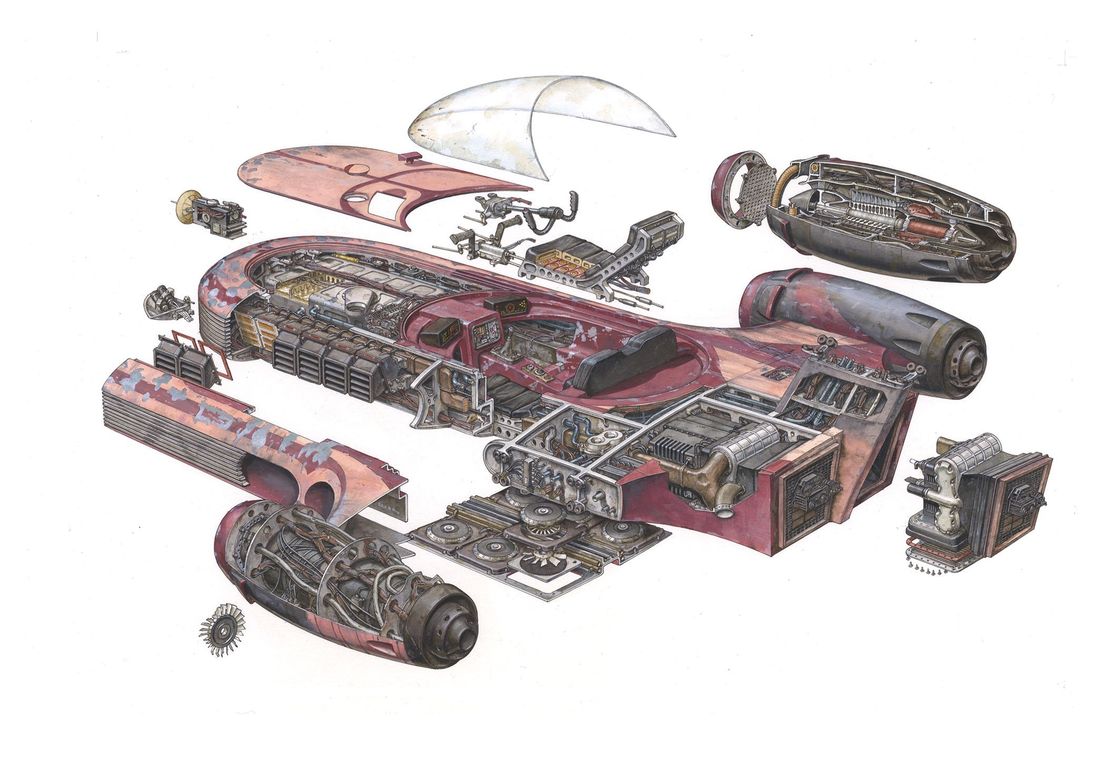
Finished. I've never seen a digital artwork that can match the richness of colour, texture and interpretation of detail that can be achieved with traditional paper, ink and paint.